
HDB24EA Guide
User manual for HDB24EA

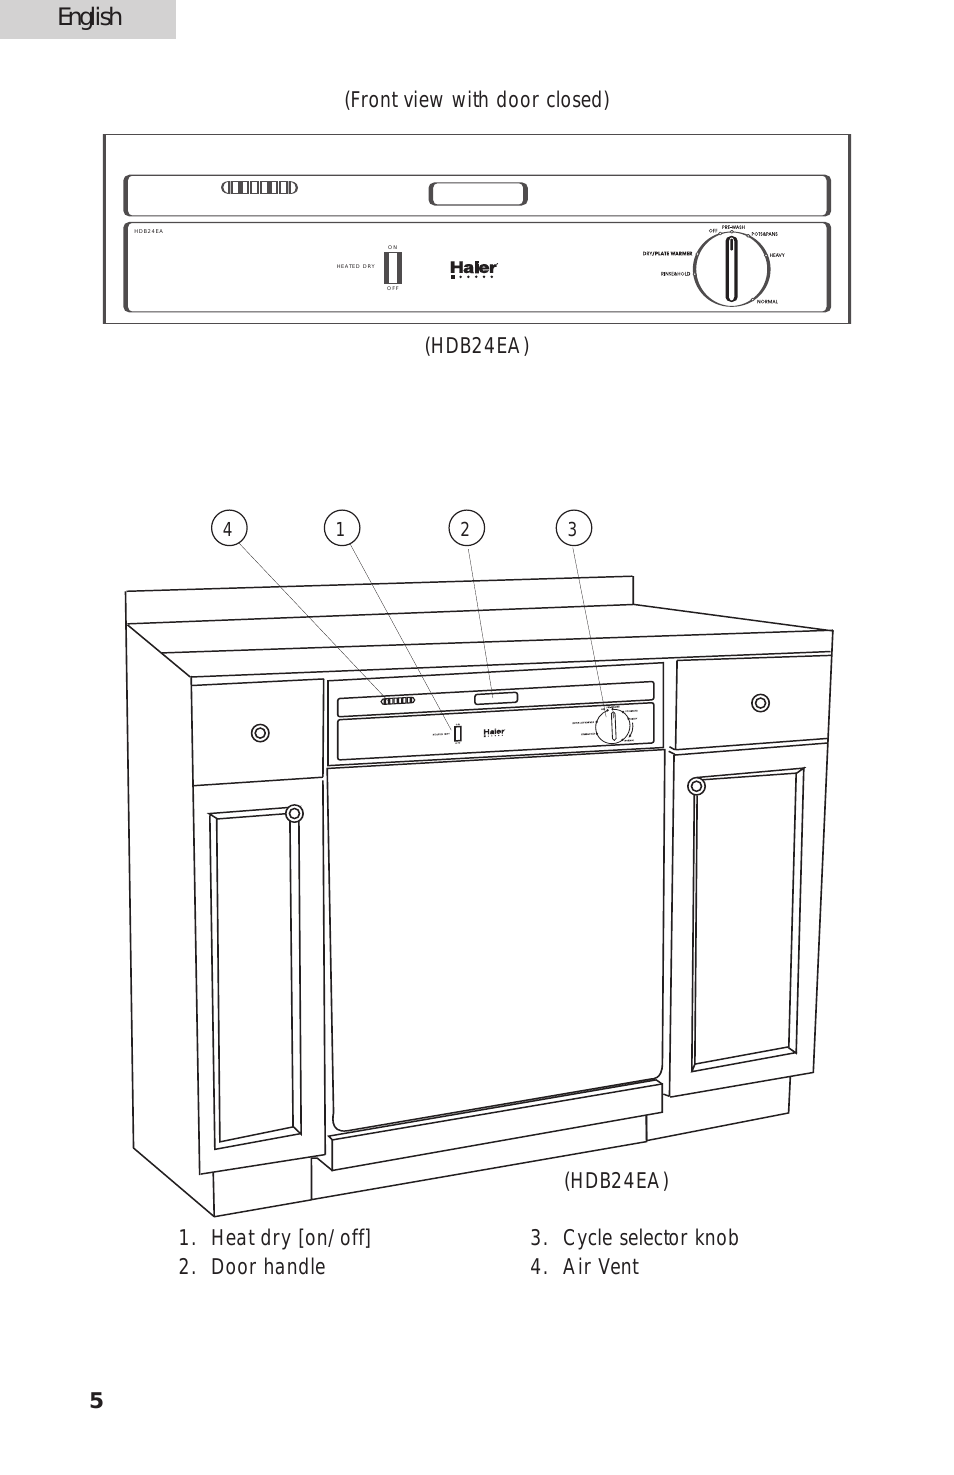
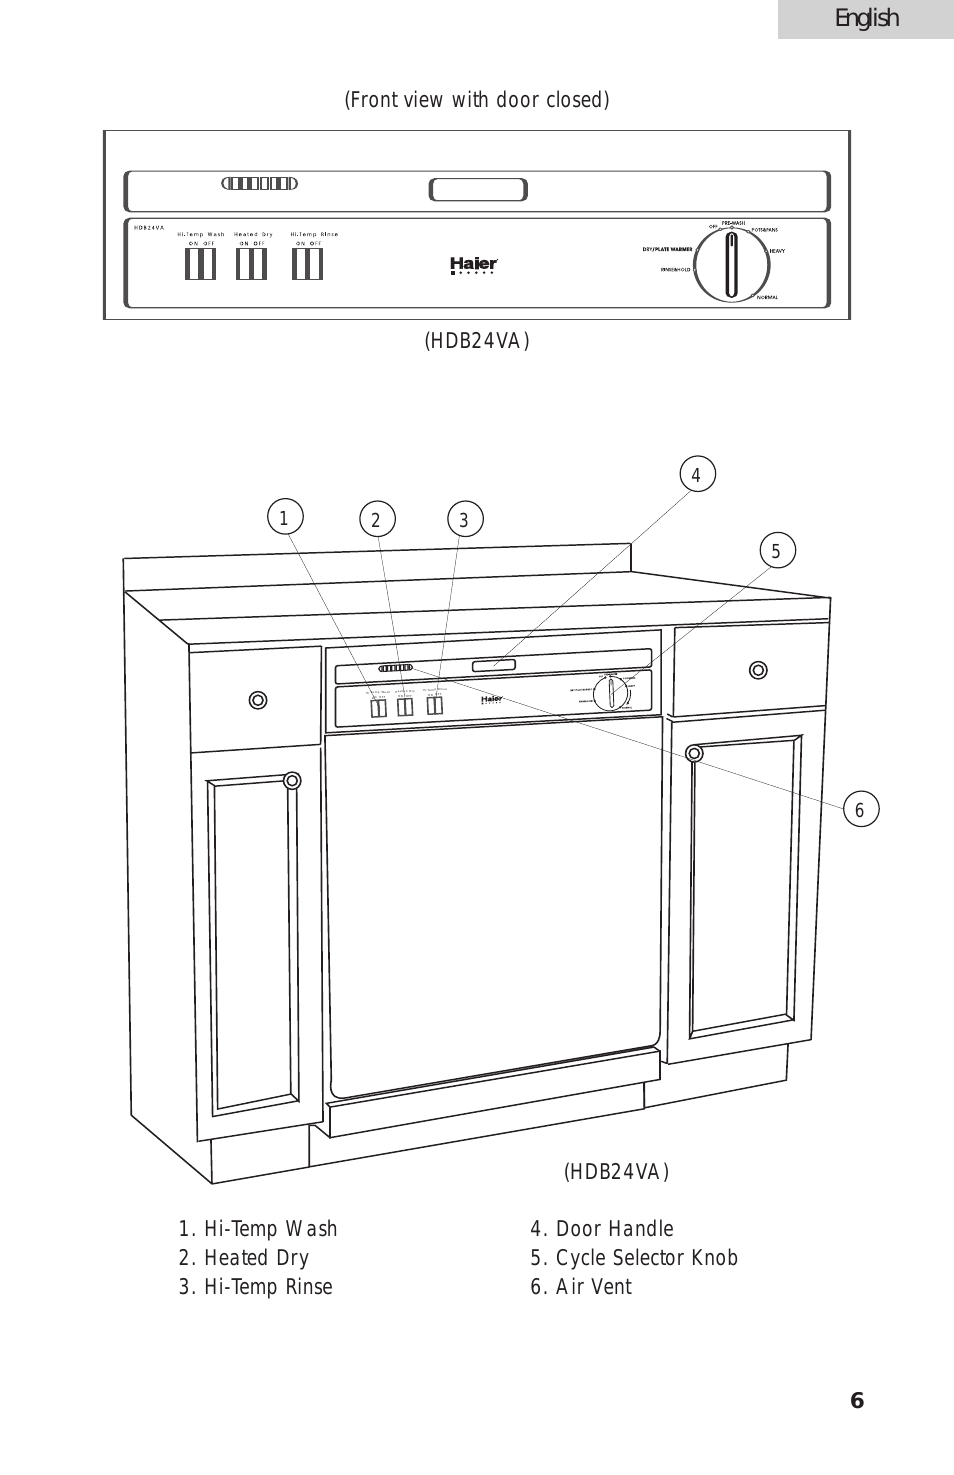


Table of contents
Document Outline
- TABLE OF CONTENTS
- INTRODUCTION
- ák WARNING
- A WARNING
- CAUTION
- A WARNING
- CAUTION
- Tools needed
- Planning
- Planning (Continued)
- Assemble the Rail and Attach the Cable Pulley Bracket
- ASSEMBLY STEP 2
- ASSEMBLY STEP 3
- INSTALLATION
- INSTALLATION STEP 4
- INSTALLATION STEP 6
- INSTALLATION STEP 8
- ADJUSTMENT STEP 1
- ADJUSTMENT STEP 2
- ADJUSTMENT STEP 3
- ADJUSTMENT STEP 4
- A WARNING
- ik WARNING
- HAVING A PROBLEM?
- PROGRAMMING
- REPAIR PARTS
- Rail Assembly Parts
- Installation Parts
- Motor Unît Assembly Parts
- 139.53702
- Emergency Key Release;
- Premium Control Console:
- 139.53681
- 139.53680
- Security+®3-Function Remote Control:
- Security+®Compact 3-Funct!on Remote Control:
- 139.53704
- 8 (2.4 m) Foot Rail Extension
- 139.53684
- Multi-Function Keyless Entry:
- 139.53705
- 139.53589
- 10 (3 m) Foot Rail Extension:
- Support Brackets:
- 139.53786
- 139.53709
- Plug-In Light Control:
- Door Clearance Brackets:
- WARRANTY
Related manuals for HDB24EA


New Manuals
- ZyXEL Communications ZyXEL G-162 Video Gaming Accessories User Manual
- ZyXEL Communications EW103U/A Video Gaming Accessories User Manual
- Western Telematic RSM-8 Video Gaming Accessories User Manual
- Western Telematic RSM-32DC Video Gaming Accessories User Manual
- Western Telematic RSM-32 Video Gaming Accessories User Manual
- Western Telematic RSM-16DC Video Gaming Accessories User Manual
- Western Telematic RSM-16 Video Gaming Accessories User Manual
- Viking Electronics FBI-1A Video Gaming Accessories User Manual
- Viking Electronics DVA-500A Video Gaming Accessories User Manual
- Viking Electronics DVA-3003 Video Gaming Accessories User Manual
- Viking Electronics DVA-2W Video Gaming Accessories User Manual
- Viking Electronics DVA- 1003B Video Gaming Accessories User Manual