
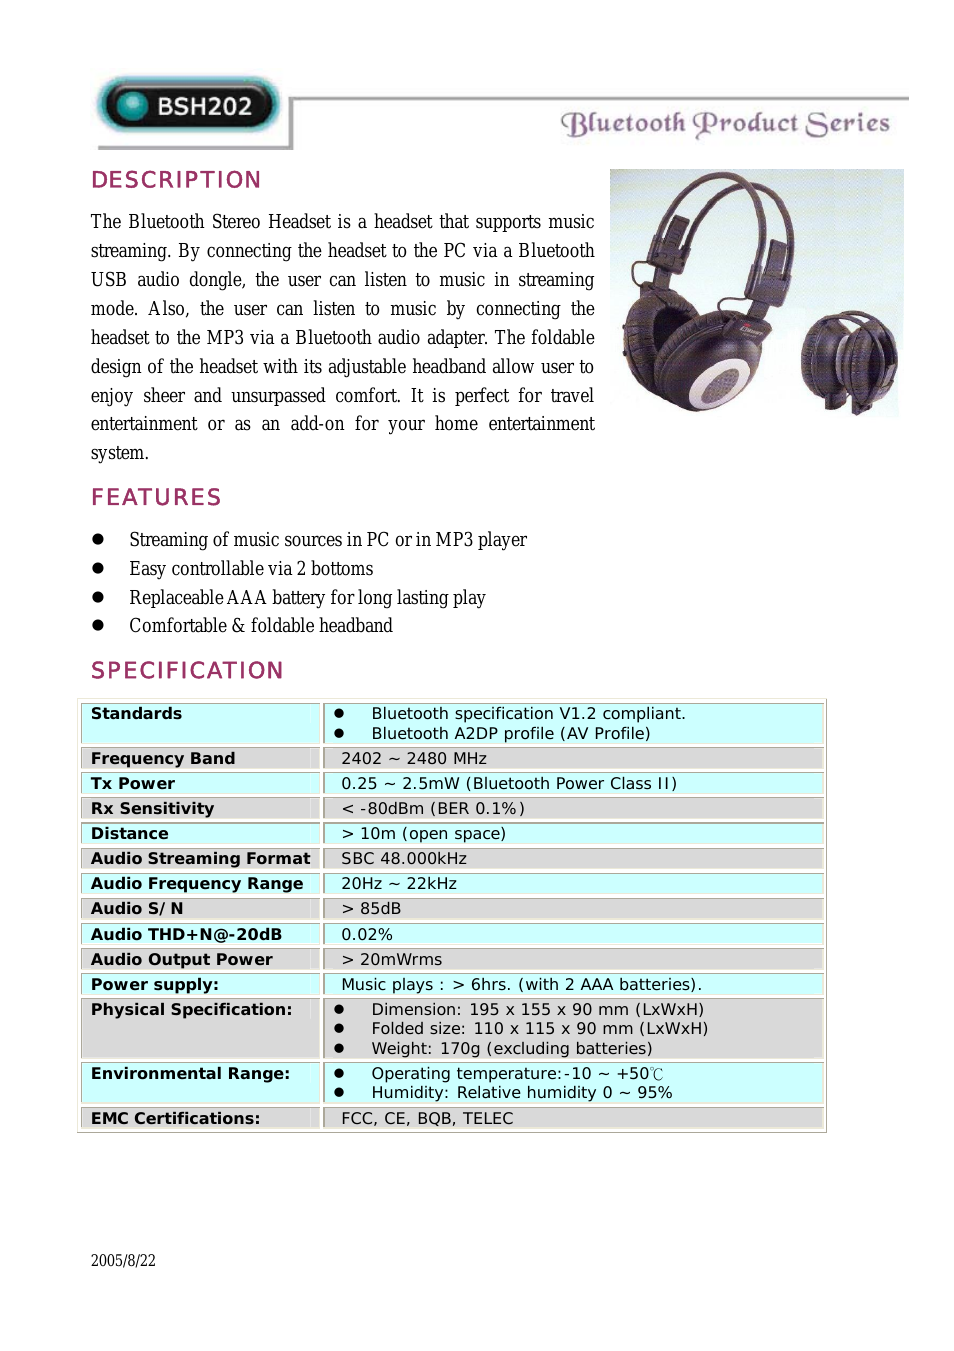
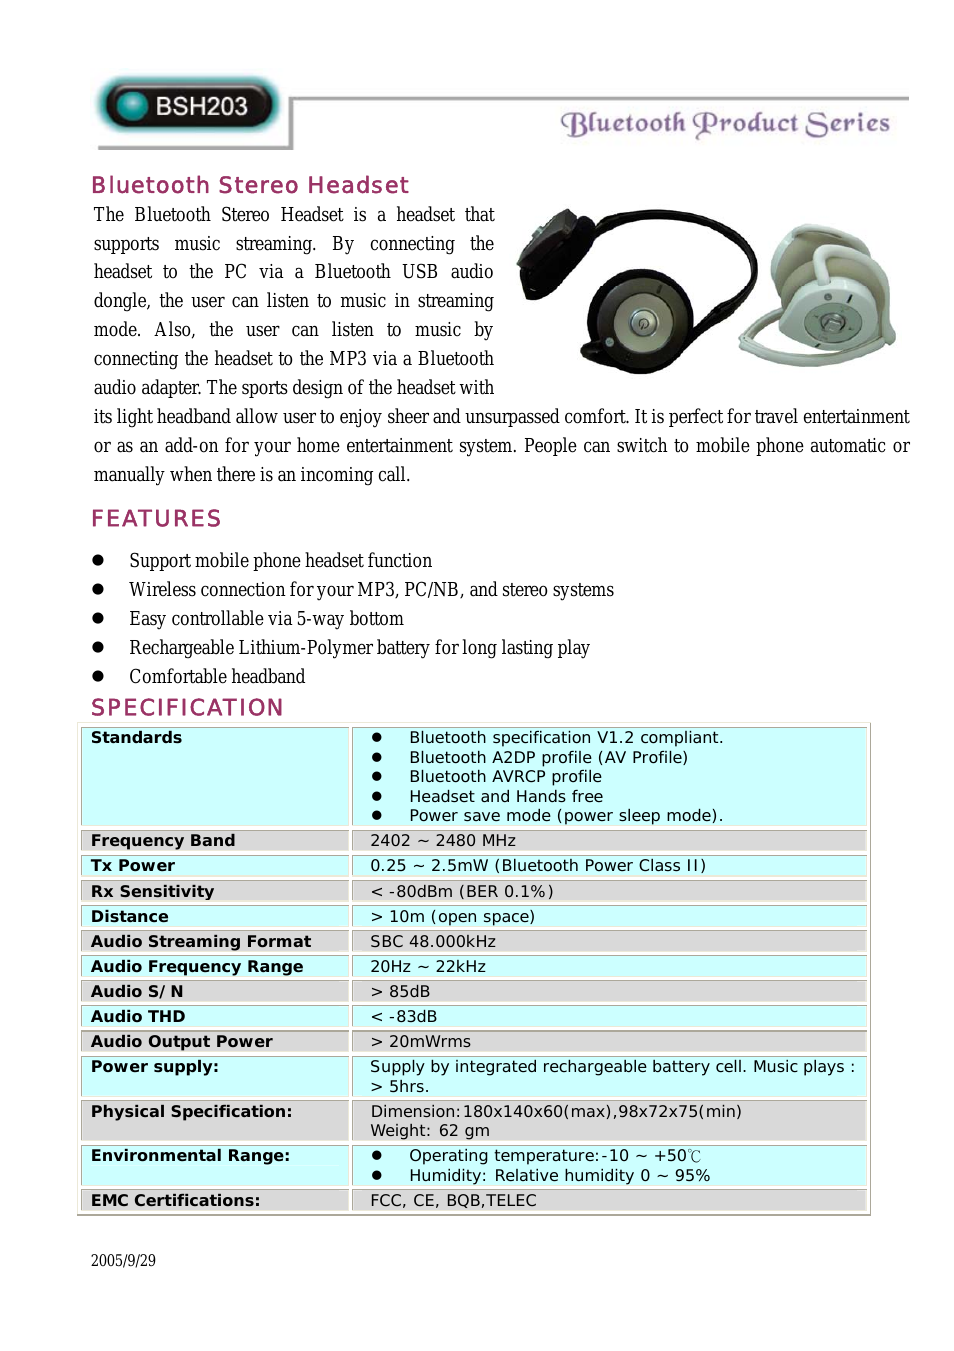
AE2700 EN Guide
User manual for AE2700 EN
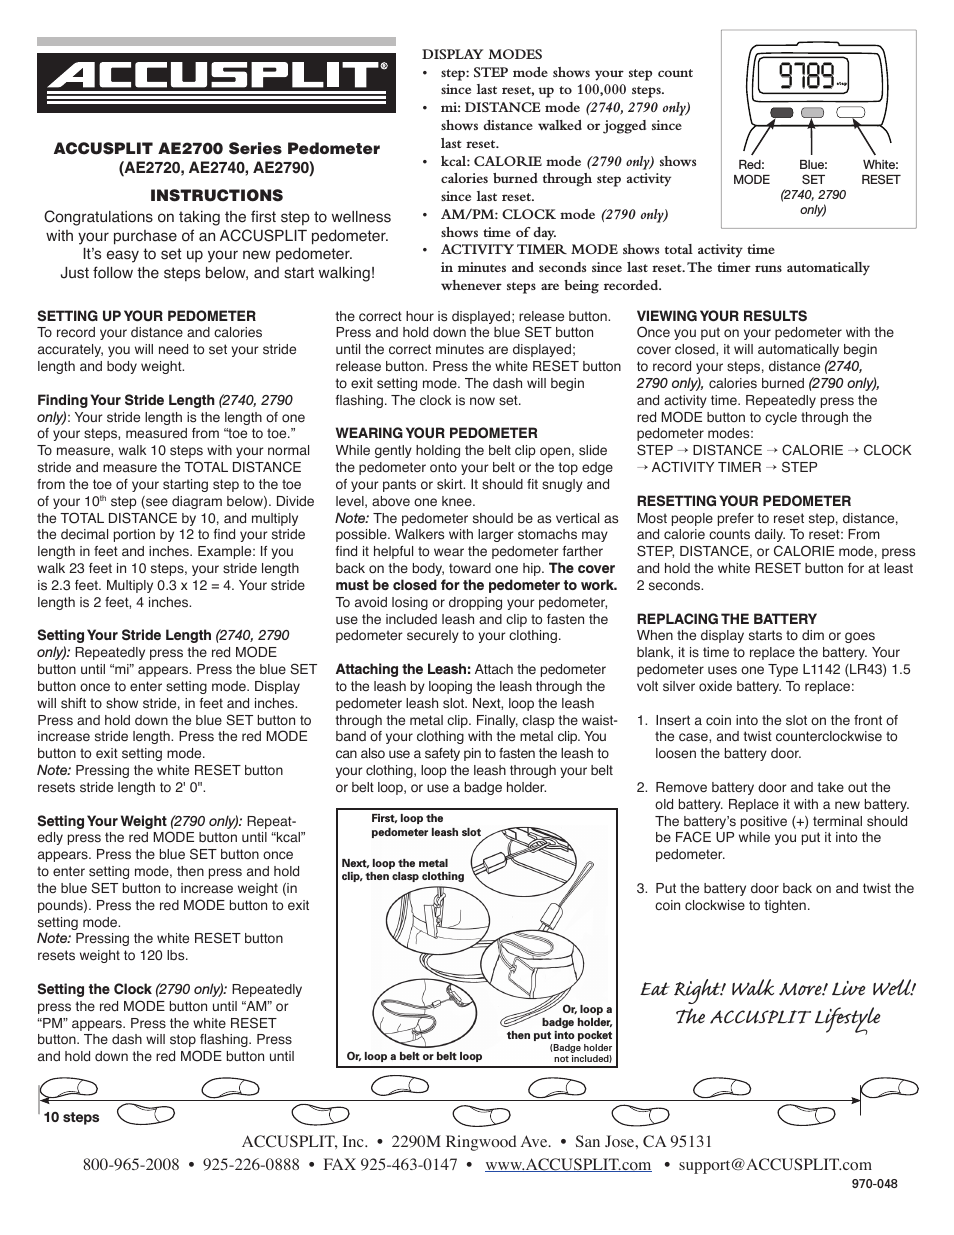
Table of contents
Document Outline
- Chapter 1: Product Overview
- Chapter 2: Hardware Installation
- 2.1 Installing the Hard Disks
- 2.1.1 SAS hard disks
- 1. Insert the SAS hard drive into the hard disk tray. Screw the sides to secure the hard disk. Repeat this procedure to install more hard disks.
- 2. Insert the key to the key slot and turn to unlock the front panel door.
- 3. Pull open the front panel door.
- 4. Insert the hard disk trays into the empty slots.
- 5. Push down the tray handle to secure the hard disk tray into place.
- 6. Repeat steps 4 to 5 until all the required disks have been installed.
- 7. Close the front panel door, then lock it.
- 2.1.2 SATA hard disks
- AA-MUX Adapter
- 1. Place the AA-MUX adapter on the hard disk tray and attach the four screws as shown.
- 2. Place the hard disk into the hard disk tray with the drive connectors facing the AA-MUX adapter.
- 3. Slide the hard disk towards the AA-MUX adapter and connect the power and data connectors.
- 4. Attach the screws to secure the hard disk.
- 5. Insert the hard disk tray into an empty slot.
- 6. Push down the tray handle to secure the hard disk tray into place.
- 7. Repeat steps 1 to 6 until all the required disks have been installed.
- 8. Close the front panel door, then lock it.
- AA-MUX Adapter
- 2.1.1 SAS hard disks
- 2.2 Mounting the RAID system
- 1. Attack eight rack nuts into the rack, making sure that they correspond with the mounting points on the rails.
- 2. Adjust the length of the rails as needed.
- 3. Secure the rails using two nuts and bolts on both the front and back posts of the rack.
- 4. Tighten the locking screws.
- 5. Slide the RAID system into the rack and secure it into place using the fixing screws.
- 2.2.1 Installing the Rail Extenders
- 2.1 Installing the Hard Disks
- Chapter 3: System Connections
- Chapter 4: Maintenance
- 4.1 Replacing a Disk
- 1. Unlock and open the front panel door.
- 2. Push the button to release the tray handle.
- 3. Grab the handle and gently pull out the disk tray.
- 4. Unscrew the hard disk to detach it from the disk tray.
- 5. Replace with a new hard disk. To install the hard disk, see also 2.1 Installing the Hard Disks on page 2-16 for more details.
- 6. Slide the disk tray back into the empty slot then push down the tray handle.
- 7. Close and lock the front panel door..
- 4.2 Replacing a Controller
- 1. Disconnect the fiber or SAS cables, mananagement, and serial power cables connected to the faulty controller.
- 2. Loosen the screws of the controller.
- 3. Lift the handle to eject the controller.
- 4. Gently pull out the controller.
- 5. Insert the new controller into the slot with the handle lifted.
- 6. Push down the handle to lock the controller into place.
- 7. Tighten the screws to secure the controller.
- 8. Connect the fiber or SAS cables, management and serial cables.
- 4.3 Replacing a Power Supply
- 1. Identify the faulty power supply.
- 2. Detach the power cable from the power supply.
- 3. Loosen the screws of the faulty power supply.
- 4. To remove the power supply, press the release catch and pull the handle at the same time.
- 5. Press the release catch and push with the handle at the same time to insert the new power supply into the slot.
- 6. Tighten the screws back to secure the power supply.
- 4.4 Upgrading Memory
- 1. Loosen the screws of the controller.
- 2. Forcefully lift up the handle to eject the controller, then gently pull it out.
- 3. To remove the memory card, release the retaining clips to eject the memory from the socket.
- 4. Gently push the new memory card into the socket.
- 5. Push the corners of the memory until the retaining clips click into place.
- 6. Insert the controller back into the slot, then push down the handle to loc.
- 7. Tighten the screws to secure the controller.
- 4.5 Replacing a Fan Module
- 4.6 Installing Battery Backup Module
- 4.6.1 A12R/U-FS&SS BBM Installation
- 1. Loosen the screws and pull out the cooling fan tray.
- 2. Place the BBM on the allocated slot (A).
- 3. Secure the BBM by fastening 4 screws on the bottom of the cooling fan tray (B).
- 4. Connect the small end of the cable to the connector port of the BBM. Then connect the other end to the cooling fan tray.
- 4.6.2 A16R/U-FS&SS BBM Installation
- 1. Loosen the screws and pull out the IO tray.
- 2. Place the BBM on the allocated slot with the connector port facing the IO board (A).
- 3. Secure the BBM by fastening 4 screws on the bottom of the IO tray (B).
- 4. Connect the small end of the cable to the connector port of the BBM. Then connect the other end to the IO board.
- 4.6.3 A24R/U-FS&SS BBM Installation
- 4.6.1 A12R/U-FS&SS BBM Installation
- 4.1 Replacing a Disk
- Appendix A: Specifications
- Appendix B: Accessories
- Appendix C: Company Contact
Related manuals for AE2700 EN

New Manuals
- ZyXEL Communications ZyXEL G-162 Video Gaming Accessories User Manual
- ZyXEL Communications EW103U/A Video Gaming Accessories User Manual
- Western Telematic RSM-8 Video Gaming Accessories User Manual
- Western Telematic RSM-32DC Video Gaming Accessories User Manual
- Western Telematic RSM-32 Video Gaming Accessories User Manual
- Western Telematic RSM-16DC Video Gaming Accessories User Manual
- Western Telematic RSM-16 Video Gaming Accessories User Manual
- Viking Electronics FBI-1A Video Gaming Accessories User Manual
- Viking Electronics DVA-500A Video Gaming Accessories User Manual
- Viking Electronics DVA-3003 Video Gaming Accessories User Manual
- Viking Electronics DVA-2W Video Gaming Accessories User Manual
- Viking Electronics DVA- 1003B Video Gaming Accessories User Manual